Whip Up Easy 3-Ingredient Chocolate Whipped Cream for Instant Dessert Perfection
Imagine a dessert topping that’s light, airy, subtly sweet, and bursting with rich chocolate flavor. Now, imagine making it in minutes with just three simple ingredients you likely already have on hand. Welcome to the delightful world of homemade
chocolate whipped cream – a game-changer for any sweet treat, from pies and pastries to hot beverages and fresh fruit. Forget store-bought alternatives; this homemade version offers unparalleled freshness, texture, and taste that will elevate your desserts from ordinary to extraordinary.
Often overlooked in its simplicity, homemade whipped cream is a culinary marvel. But for those who crave a little extra indulgence, its chocolate counterpart is nothing short of revolutionary. It takes all the best qualities of classic whipped cream – its ethereal lightness, its delicate sweetness, its silky-smooth texture – and infuses them with a deep, creamy chocolate dimension. Best of all, this incredible creation doesn't demand a complex recipe or exotic ingredients. It's truly a testament to how the finest flavors can emerge from the simplest combinations.
The Magic Behind 3-Ingredient Chocolate Whipped Cream
At its heart, this spectacular
chocolate whipped cream relies on just three foundational components. Each plays a crucial role in delivering that irresistible flavor and texture, making the entire process surprisingly straightforward. Understanding these ingredients and their function is the first step toward whipping up perfection.
- Cold Heavy Cream (or Heavy Whipping Cream): This is the backbone of your whipped cream. The high fat content (typically 36% or more) in heavy cream is what allows it to trap air when agitated, expanding into a stable, fluffy foam. It’s absolutely essential that your cream is as cold as possible – ideally straight from the refrigerator – to ensure optimal whipping and maximum volume. Do not substitute with lower-fat dairy products like half-and-half or milk; they simply won't whip.
- Confectioners' Sugar (Powdered Sugar): Unlike granulated sugar, confectioners' sugar is finely milled and contains a small amount of cornstarch. This fine texture allows it to dissolve instantly into the cream without leaving a grainy residue, resulting in a smooth, luxurious finish. The cornstarch also acts as a stabilizer, helping the whipped cream hold its structure longer. It provides just the right touch of sweetness without overpowering the chocolate.
- Unsweetened Cocoa Powder: This is where the magic of chocolate infusion happens. Unsweetened cocoa powder delivers that deep, rich chocolate flavor without adding extra sugar, allowing you to control the sweetness perfectly. For an even more intense and nuanced chocolate experience, consider using Dutch-processed cocoa powder, which is less acidic and provides a darker color and smoother flavor profile. However, regular unsweetened cocoa powder works beautifully too.
The synergy of these three ingredients, when properly combined, transforms into a luxurious topping that tastes far more elaborate than its humble origins suggest.
Mastering the Technique: Your Step-by-Step Guide to Fluffy Peaks
Creating perfect
chocolate whipped cream isn't just about the ingredients; it's equally about the technique. While incredibly simple, a few critical steps will ensure your success every time, yielding light, airy, and stable whipped cream.
- Chill Your Equipment: The Golden Rule. This step cannot be overstated. Place your mixing bowl (preferably metal or glass) and your whisk attachments (from a hand mixer) or the whisk from your stand mixer into the freezer for at least 15-20 minutes before you begin. The colder your equipment, the faster and more efficiently your cream will whip, and the more stable your finished product will be. This crucial preparation helps the fat globules in the cream solidify, making them more effective at trapping air. For a deeper dive into this vital step, check out our guide on Secrets to Perfect Chocolate Whipped Cream: Chill Your Bowl.
- Prepare Your Dry Ingredients: Sift for Smoothness. While your bowl and beaters are chilling, it's time to combine your confectioners' sugar and cocoa powder. Sift these two ingredients together onto a piece of waxed paper or directly into a separate small bowl. Sifting is important to remove any lumps from the cocoa powder and confectioners' sugar, ensuring a silky-smooth whipped cream without any gritty bits. Once sifted, whisk them gently to combine thoroughly.
- Combine and Start Whipping. Retrieve your super-chilled bowl and whisk. Pour the very cold heavy cream into the bowl. Begin mixing on a low speed (using either a hand mixer or stand mixer) for about 30 seconds to a minute, allowing the cream to start thickening slightly.
- Gradually Add Dry Ingredients. Once the cream has just begun to thicken, slowly and gradually add your sifted sugar and cocoa mixture to the cream. Adding it slowly helps prevent the powders from flying everywhere and ensures they are evenly incorporated.
- Increase Speed and Whip to Perfection. Once the dry ingredients are mostly combined, increase your mixer speed to medium-high or high. Continue to whip the mixture. You'll notice the liquid transforming into a light, fluffy, and airy cloud. Keep an eye on the consistency:
- Soft Peaks: The cream will hold a shape, but the peaks will gently fold over when you lift the whisk. This is perfect for a lighter topping.
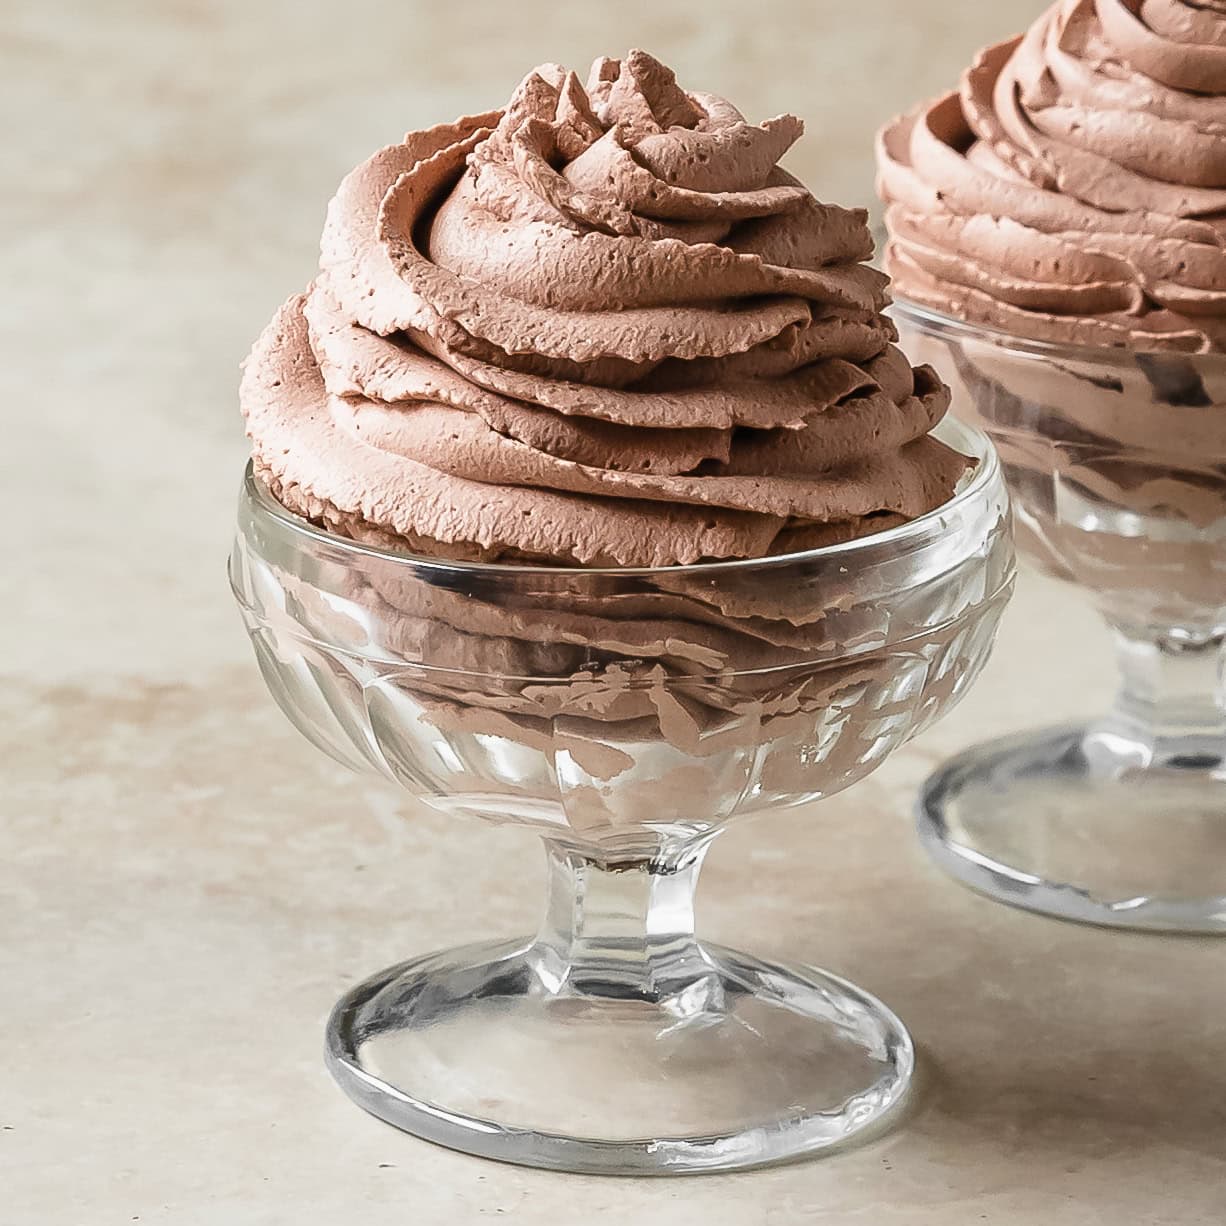
- Medium Peaks (Desired Consistency): Often described as having the consistency of shaving cream, this is where the cream holds its shape well, and the peaks stand tall but still have a slight curl at the tip. This is ideal for most dessert toppings and provides good structure.
- Stiff Peaks: The cream will be very firm, and the peaks will stand straight up. While great for piping, be cautious not to go too far beyond this.
The entire whipping process typically takes about 3-4 minutes, but this can vary based on your mixer and the coldness of your ingredients.
- Avoid Overmixing! This is the most crucial warning. Whipped cream can go from perfectly fluffy to grainy and separated (bordering on butter) in a matter of seconds if overmixed. Stop whipping as soon as you reach your desired consistency. If you accidentally overmix slightly and it becomes a bit lumpy, sometimes a spoonful or two of unwhipped cold cream gently folded in can help salvage it.
Elevate Your Desserts: Versatile Uses for Chocolate Whipped Cream
The beauty of homemade
chocolate whipped cream lies not only in its exquisite taste but also in its incredible versatility. It's far more than just a simple topping; it's an ingredient that can transform an ordinary dessert into a showstopper.
*
The Ultimate Dessert Topping: Drizzle it over fresh berries, dollop it onto a slice of apple pie or pecan pie, swirl it into a bowl of vanilla ice cream, or serve it alongside brownies and lava cakes. Its creamy richness perfectly complements a wide array of desserts, adding lightness and a delicate chocolate finish.
*
Fantastic Frosting Alternative: Its sturdy yet airy texture makes it an exceptional choice for frosting cakes and cupcakes. Unlike traditional buttercream, it feels much lighter on the palate while still offering a rich flavor. It pipes beautifully, allowing you to create elegant swirls and designs. For more ideas on how to use it in this capacity, explore
Chocolate Whipped Cream: Perfect Dessert Topping & Frosting.
*
Hot Beverage Enhancer: A generous dollop of chocolate whipped cream atop a steaming mug of hot chocolate, coffee, or even a mocha latte is pure bliss. It slowly melts into the drink, infusing it with extra creaminess and chocolatey goodness.
*
Breakfast & Brunch Indulgence: Don't limit it to dessert! Spoon it over pancakes, waffles, or crepes for a special breakfast treat. Pair it with fresh fruit, like sliced bananas or strawberries, for a delightful and surprisingly light start to your day.
*
Filling for Pastries: Use it as a delectable filling for éclairs, cream puffs, or between layers of a sponge cake for a lighter, chocolate-infused alternative.
Pro Tips for Perfect Chocolate Whipped Cream Every Time
Achieving consistently perfect
chocolate whipped cream is easy once you grasp a few expert insights and subtle nuances.
*
Ingredient Temperature is Paramount: We've stressed it, but it bears repeating: every single ingredient, especially the heavy cream, must be as cold as possible. This ensures the fat molecules are firm and capable of holding air efficiently.
*
Quality Matters: While the ingredients are few, their quality profoundly impacts the final taste. Opt for good quality heavy cream and a cocoa powder whose flavor you enjoy.
*
Consider Optional Flavor Enhancers: While the core recipe is 3-ingredient, you can subtly enhance the flavor profile with a tiny addition without complicating things. A pinch of sea salt can remarkably boost the chocolate flavor, cutting through the sweetness. A quarter teaspoon of pure vanilla extract or a tiny dash of espresso powder can also deepen the chocolate notes beautifully without making it taste like coffee.
*
Don't Rush the Sifting: Lumps of cocoa or sugar can ruin the silky texture. Take the extra minute to sift properly.
*
Monitor Constantly: Whipping cream is a delicate balance. Don't walk away from the mixer. Watch for the consistency you desire, and stop immediately. It's better to slightly under-whip and then give it a few more seconds than to over-whip.
Storing Your Homemade Indulgence
One of the great advantages of homemade
chocolate whipped cream is its ability to be prepared ahead of time, ensuring you're always ready for an impromptu dessert.
*
Refrigeration: Store your whipped cream in an airtight container in the refrigerator for up to two days. After refrigeration, it might lose some of its initial volume or separate slightly. If this happens, a quick re-whip with a hand mixer for 30 seconds to a minute will usually bring it back to its fluffy glory.
*
Freezing: Yes, you can freeze chocolate whipped cream! Transfer it to a freezer-safe container, leaving a little room at the top for expansion. It can be stored in the freezer for up to three months. When you're ready to use it, allow it to thaw slowly in the refrigerator overnight. While the texture might be slightly different from freshly made, it will still be delicious and perfectly usable, especially as a topping or incorporated into other desserts.
In conclusion, whipping up your own 3-ingredient
chocolate whipped cream is an effortlessly rewarding culinary endeavor. It's a testament to the power of simplicity, transforming humble ingredients into a luxurious, versatile topping that enhances virtually any dessert. From the satisfying thrum of the mixer to the sight of those perfectly formed peaks, the process itself is a joy, culminating in a taste that is nothing short of sublime. So, grab your cold cream, a whisk, and those two essential powders – you're just minutes away from creating a chocolatey cloud of deliciousness that will delight your taste buds and impress your guests.